Glamping photos can be deceiving. That dreamy safari tent might turn out to sit right next to a busy road, have a shared bathroom a five-minute walk away, or come without heating on a chilly night. If you want to choose a glamping site that actually matches the picture in your head, you need to look past the photos and check the practical details before you book.
This guide walks you through the whole process for first-timers: figuring out what comfort level you really need, picking the right season and location, setting a realistic budget, reading amenities and site facilities properly, and getting the booking timing and fine print right. We finish with a short list of questions to ask before you confirm, so your first glamping trip is sorted from the start.
What Kind of Glamping Stay Fits Your Comfort Level
Glamping covers everything from a canvas tent with a cot to a heated cabin with a full bathroom, so the first step is being honest about how rustic you want to go. Safari tents and yurts are the classic entry point. You get a real bed, solid furniture and often a wood stove or small deck, but the walls are still fabric, you will hear the wind, and mornings can be chilly outside the warm months.
When you want it to feel like a hotel
Geodesic domes and cabins are the safer bet for first-timers who want fewer surprises. These units typically offer heating, insulation and an en-suite bathroom, which makes a big difference on a cold or rainy night. If you have never slept away from a proper building before, starting here means you can decide later whether you want to rough it more.
Treehouses and A-frame lodges sit at the top of the range, usually at $400+ per night, and they deliver the most hotel-like experience: proper construction, real windows, and design touches that make the stay feel special. They are worth it for an anniversary or milestone trip, even if they stretch the budget.
Whatever type you choose, decide early which three things matter most: electricity, Wi-Fi and a private bathroom. Basic tent sites often lack all three, and discovering that after booking is the fastest way to ruin a first glamping trip. Match the unit type to your comfort level, not just the photos.
Picking the Right Season and Location
Weather is the biggest variable in whether your first glamping trip feels magical or miserable. In most of Europe and North America, the reliable window runs from May to September, when nights are warm enough that a tent, dome or yurt stays comfortable without extra layers. If you are flexible on dates, aim for that stretch for your first trip so you can judge sites fairly rather than battling the elements.
Why shoulder months deserve a look
April, May and October are the quiet sweet spot. Rates typically drop 20-40% below peak summer prices, and you will share the site with far fewer neighbors, which matters if you want the peaceful morning-coffee-with-a-view experience. The tradeoff is cooler evenings and a higher chance of rain, so pack accordingly and favor units with solid insulation if you book outside the core summer months.
Location deserves more thought than most first-timers give it. A beautiful dome in the wrong spot can leave you driving hours every day. Look for a site within 30-90 minutes of the trailhead, lake or town that is the actual reason for your trip. Map the route before booking, not after, and check whether the last stretch is a paved road or a rough track your rental car will dislike.
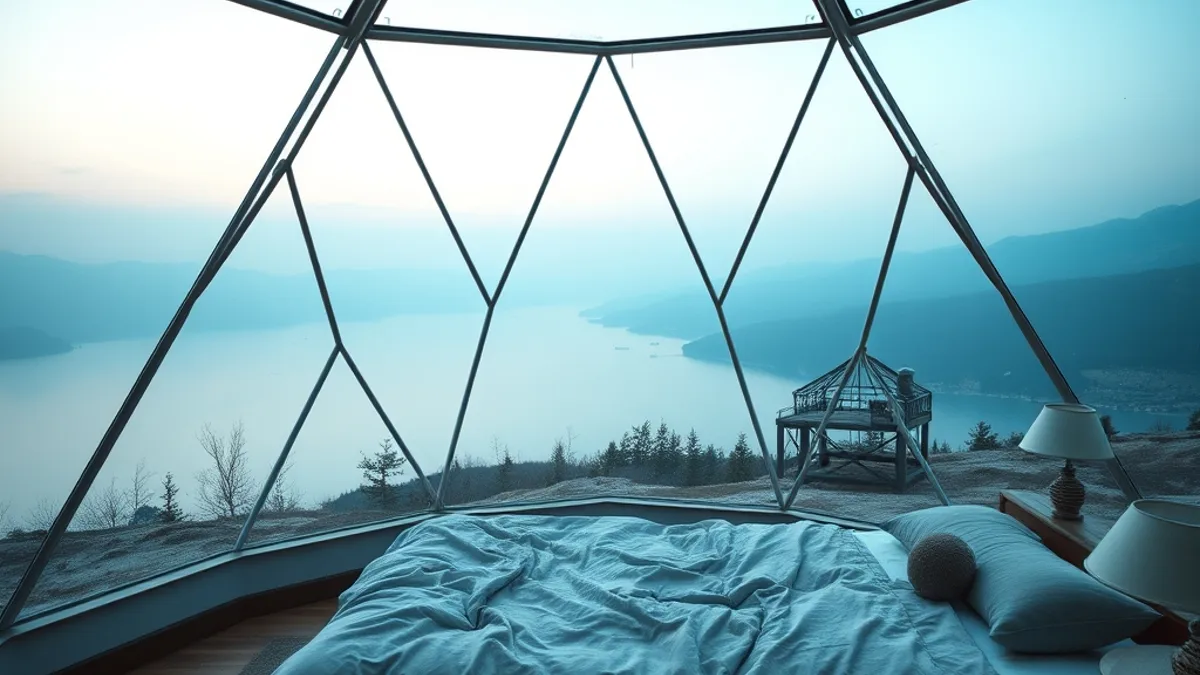
Finally, study elevation and exposure. Cliffside and coastal sites can be cold and windy even in July, when inland valleys are balmy. Alpine locations are especially prone to this, as you can see in a French Alpine cliffside glamping stay, where dramatic views come with a real chill after sunset. Read the site’s own description carefully for words like “exposed” or “sea breeze,” and bring warm layers regardless of the forecast.
Setting a Realistic Budget
Glamping prices vary more than most first-timers expect, and the gap between a basic furnished tent and a luxury dome or lodge reflects real differences: insulation, private bathrooms, heating and often the view. Decide what you genuinely need before comparing rates, because paying for a premium unit you barely use is money wasted. A mid-range unit with a proper bed and shared facilities can be the sweet spot if you plan to spend your days hiking or on the water anyway.
Also budget beyond the nightly rate. Many sites charge separately for things you might assume are included, and these extras can add up quickly over a multi-night stay. Before booking, scan the site’s rates page or ask directly about add-on fees so your final total doesn’t surprise you.
- Firewood: some sites sell bundles on-site while others include a starter supply per night; ask how much a typical evening campfire actually costs if fires are part of the experience you’re paying for.
- Breakfast packages: a delivered morning basket or on-site café meal is convenient but usually priced per person, so double the cost for couples and factor it into every morning of your stay.
- Activity fees: guided walks, kayak rentals, stargazing sessions and kids’ programs are often run by the site or a local operator and booked as paid extras rather than free amenities.
- Cleaning or service charges: a few sites add a flat fee per booking or per pet, which matters more on a two-night stay than a weeklong one.
If you want a premium unit without peak pricing, target midweek stays in shoulder season. Demand drops sharply outside summer weekends, which is exactly when the best domes and lodges are both cheaper and easier to book. You’ll often get the top-tier unit you wanted for well below its high-season rate. Compare the total cost across two or three sites rather than fixating on the headline nightly rate, since one site’s all-inclusive pricing can beat another’s rate-plus-extras even when the sticker prices look similar.
How to Read Amenities and Site Facilities
Amenity lists on glamping websites can be vague, so read them with a skeptical eye. The single most important question is who uses the bathroom. Some units have an en-suite bathroom inside the structure, some offer a private bathroom a short walk away that only your unit uses, and many budget-friendly sites rely on shared shower blocks. Any of these can be fine, as long as you know before you book rather than when you arrive with a towel in hand.
If you are traveling outside the May to September peak, heating matters more than almost anything else. A space heater is not the same as proper heating in a dome or tent, and cold floors will make even a heated unit uncomfortable. The fact sheet for a well-run winterized unit is simple: real heating, insulated flooring and a solid roof. Ask the host directly which of those the unit has, because photos rarely show it.
Kitchen setups vary more than first-timers expect. A safari tent might include just a two-burner stove and a cooler, while a cabin could have a full kitchenette with a fridge and sink. Others offer only a communal camp kitchen, which means cooking alongside other guests and planning around shared equipment.
Before paying, spend ten minutes on recent reviews and search them for three words: clean, noisy and photos. Older reviews may describe units that have since been renovated or neglected, so prioritize ones from the last season or two.
- Count the actual bathrooms on site. A site with four units and one shared shower block can mean morning queues, so ask how many units share each facility.
- Ask where the bathroom sits relative to your unit. A private bathroom 100 meters down a gravel path feels very different in rain or with kids than one attached to the tent.
- Check if hot water is on demand or limited. Some eco-minded sites use solar or tank systems that run out, which changes when you want to shower.
- Look for reviews mentioning seasonal closures. Communal kitchens, pools or outdoor showers sometimes shut outside peak months, so confirm what operates during your dates.
- Compare reviewer photos to listing photos. Guest pictures show the real condition of flooring, bedding and cooking gear, which professional shots tend to flatter.
Booking Timing and Fine Print
Glamping sites are small operations, and that changes how you should book them. Many have fewer than a dozen units, so the best ones go fast, and the fine print can be stricter than what you are used to from hotels. A little timing and a careful read before you pay will save you both money and stress. Here is how to approach it.
- Book 3-6 months ahead for summer weekends. Peak season runs May to September, and the most desirable units, like domes with en-suite bathrooms, are usually the first to sell out for Friday and Saturday nights. If you have your heart set on a specific unit, reserve as soon as dates open, and confirm the cancellation terms in the same message.
- Use shorter lead times for midweek stays. Two to four weeks ahead is often enough for a midweek night in April, May or October. This flexibility works in your favor if your schedule allows weekday trips, and you will often find better availability across several sites rather than just one.
- Plan around minimum stays. Requirements of 2-3 nights are common on weekends and holidays. If you only want one night, either target midweek dates or build a longer weekend around the minimum rather than fighting it. Ask when you book whether the minimum can be waived for a late opening.
- Read the cancellation window before paying. Small, family-run glamping sites often have stricter terms than hotel chains, sometimes with little or no refund close to arrival. Check the exact window, and consider whether travel insurance makes sense for a prepaid stay.
One last habit worth building: screenshot or save the cancellation terms at the moment you book. Policies can change between seasons, and having the version you agreed to on record makes any dispute much easier to resolve. If your dates are flexible, booking midweek in the shoulder months gives you the best combination of availability, price and lenient terms. It also leaves room to extend your stay on site if you arrive and love it.
Questions to Ask Before You Confirm
Photos on a glamping site’s listing can be generous with the truth. A dreamy dome shot at golden hour tells you nothing about where the water goes during a downpour or how the unit handles a stretch of hot, still days. Before you pay, ask the host directly what happens in heavy rain and in a heatwave. A well-built site should have real drainage around the unit, shading such as awnings or tree cover, and workable ventilation: windows that open wide, mesh panels, or a small fan. If the answer is vague, treat that as useful information.
Check-in logistics matter more at glamping sites than at hotels, because many are small operations on rural land. Confirm what time you can arrive, whether you check in at a reception or self-check-in with a code, and how far you will park from your unit. Some sites ask you to leave the car in a lot and walk your bags along a gravel path; others let you drive right up. If you are carrying coolers or traveling with kids, ask whether someone will help with luggage. Also confirm what happens if you arrive late in the dark, since finding an unlit tent on farmland is nobody’s idea of a fun start.
Finally, match the photos to your actual unit. Ask which amenities are included in your specific accommodation, which are shared, and which cost extra.
- Weather-proofing questions: ask whether the unit has covered outdoor space, so you are not stuck inside during a rainy evening, and whether there is a plan for storms, such as reinforced guy lines or a relocation option.
- Parking and access details: find out if the path to your unit is paved, gravel or grass, whether wheelbarrows or carts are provided for gear, and if there is lighting along the way for late arrivals.
- Amenity verification: confirm item by item whether the fire pit, hot tub, kitchenette, BBQ, or private bathroom shown in the listing belongs to your unit, is shared with other guests, or requires an added fee to use.
Your First Glamping Trip, Sorted
Choosing a glamping site comes down to matching the stay type to your comfort needs, picking the right season, and setting a budget that reflects reality. A safari tent, dome or cabin can all look stunning online, but only one of them will suit a first-timer who expects heating and a private bathroom. Aim for the May to September peak or a quieter shoulder month, and plan on roughly $100 to $400+ per night depending on the level of luxury you want.
Timing matters as much as the tent itself. Book 3-6 months out for summer weekends, and before you pay, confirm the details that photos never show: bathrooms, heating and the cancellation terms. Do that, and your first glamping trip will feel like a treat rather than a gamble. If this guide helped you plan yours, leave a comment or share it with a friend who is tempted to trade their suitcase for a tent.